
Introduction
There’s something magical about biting into a warm, gooey chocolate chip treat, especially when it’s filled with a perfect mix of semi-sweet chocolate and creamy white chocolate chips. This combination of rich chocolate flavor with the smooth sweetness of white chocolate has become a classic pairing in many desserts. If you’ve ever found yourself craving a sweet, melt-in-your-mouth treat, this Chocolate White Chip Treats recipe is sure to hit the spot.
Growing up, I spent many afternoons baking with my family, and my favorite moments always involved chocolate—whether it was in cakes, cookies, or these very treats. This recipe has been passed down from my grandmother, who believed that baking was the best way to spread joy. Every time I bake these treats, I’m reminded of those days spent with her in the kitchen, creating delicious memories. Now, it’s my pleasure to share this recipe with you so that you too can enjoy the same comfort and indulgence that comes with each bite.
In this recipe, I’ve chosen semi-sweet chocolate chips paired with white chocolate chips for that perfect contrast in sweetness. These treats are versatile enough to be made for holidays, casual family snacks, or special occasions. Let’s dive into the ingredients and instructions to make your next batch of chocolate white chip treats a true masterpiece!
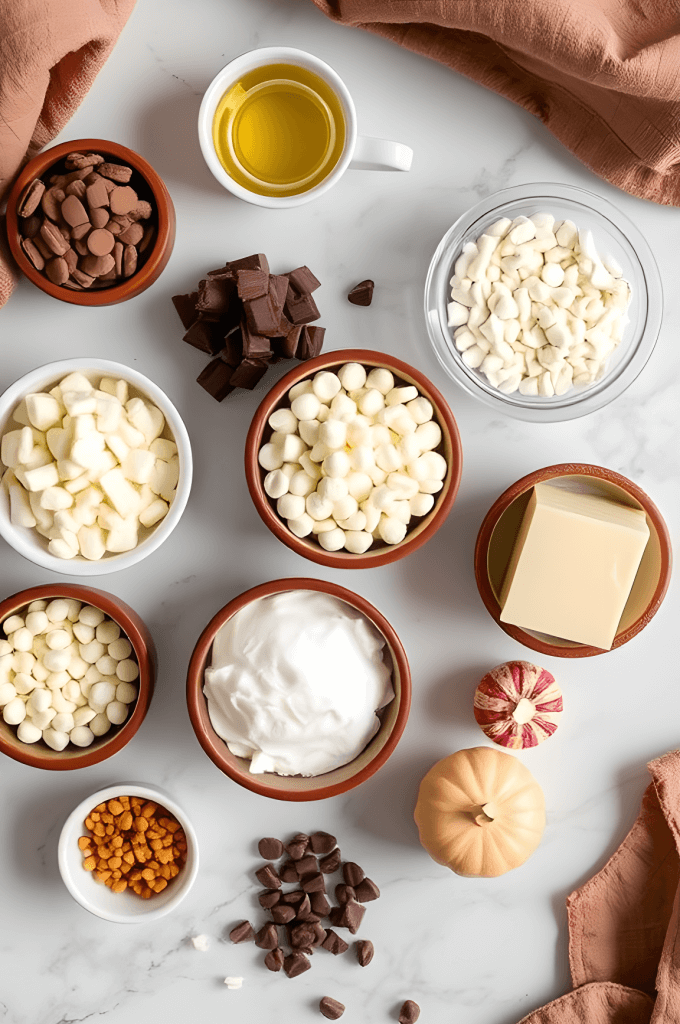
Ingredients:
For these rich, indulgent Chocolate White Chip Treats, gather the following ingredients:
- 2 1/4 cups all-purpose flour
All-purpose flour is the foundation for these treats. It creates the perfect structure while allowing the chocolate chips to shine. If you want a slightly chewier texture, you can substitute half of the all-purpose flour with whole wheat flour. - 1/2 teaspoon baking soda
Baking soda is essential for giving the treats a soft and chewy texture. It helps the dough spread and rise slightly while baking. - 1/2 teaspoon salt
Salt is the magic ingredient that helps balance the sweetness of the chocolate chips. Without it, the treats might taste too sugary, and the depth of flavor will be lacking. - 1 cup unsalted butter (room temperature)
Butter is the star ingredient in any baked treat. For the best results, use unsalted butter, so you can control the amount of salt in your recipe. The butter also contributes to the rich, melt-in-your-mouth texture. - 3/4 cup granulated sugar
Granulated sugar sweetens the dough without overpowering the other flavors. It helps create the right texture while providing a lovely golden-brown color when baked. - 3/4 cup packed brown sugar
Brown sugar adds moisture and a touch of caramel flavor. It pairs beautifully with the chocolate and enhances the overall richness of the treats. - 2 large eggs
Eggs act as a binder and help create a soft and chewy texture in these treats. They also contribute to the overall structure. - 2 teaspoons vanilla extract
Vanilla extract brings a warm, aromatic flavor that complements the chocolate perfectly. It’s an essential ingredient that should never be skipped! - 1 cup semi-sweet chocolate chips
Semi-sweet chocolate chips offer the perfect balance of bitterness and sweetness. They’re rich and indulgent without being overly sweet, making them an ideal choice for these treats. - 1 cup white chocolate chips
White chocolate chips provide a creamy contrast to the semi-sweet chocolate, creating a beautiful contrast in flavor and texture. If you prefer, you can swap these for milk chocolate chips for a sweeter result. - Optional Add-ins:
- 1/2 cup chopped nuts (e.g., walnuts, pecans, or macadamia nuts)
- 1/2 cup dried fruit (raisins, cranberries, or cherries)
These add-ins are optional but can add a delightful texture and additional flavor to your treats.
Instructions:
Step 1: Preheat the Oven and Prepare Baking Sheets
Preheat your oven to 350°F (175°C). While the oven is heating up, line two baking sheets with parchment paper to ensure easy cleanup and prevent sticking.
Step 2: Mix Dry Ingredients
In a medium bowl, whisk together the flour, baking soda, and salt. Set this aside for later. The dry ingredients are the foundation of the treats and need to be properly mixed to ensure an even distribution of the baking soda and salt throughout the dough.
Step 3: Cream Butter and Sugars
In a large mixing bowl, use an electric mixer or stand mixer to cream the butter, granulated sugar, and brown sugar together. Beat on medium speed for about 3 minutes, until the mixture is light and fluffy. This process incorporates air into the dough, giving your treats a nice texture.
Step 4: Add Eggs and Vanilla
Add the eggs, one at a time, mixing well after each addition. Then, add the vanilla extract and mix until fully incorporated. The eggs and vanilla will give the dough its rich flavor and texture.
Step 5: Combine Wet and Dry Ingredients
Gradually add the dry ingredients to the wet mixture, mixing just until incorporated. Be careful not to overmix, as this can lead to dense treats. You want the dough to be just combined.
Step 6: Fold in Chocolate Chips
Gently fold in the semi-sweet chocolate chips and white chocolate chips using a spatula. Make sure the chips are evenly distributed throughout the dough, but be gentle so you don’t break the chips.
Step 7: Scoop the Dough
Using a cookie scoop or a tablespoon, drop rounded portions of dough onto the prepared baking sheets. Space each scoop about 2 inches apart to allow room for spreading. You can make the treats smaller for bite-sized cookies or larger for big, indulgent treats.
Step 8: Bake the Treats
Bake in the preheated oven for 10-12 minutes, or until the edges of the treats are golden brown and the centers are still soft. If you prefer a chewier texture, bake for a shorter time; for a crispier result, leave them in a bit longer.
Step 9: Cool on the Baking Sheets
Allow the treats to cool on the baking sheets for 5 minutes before transferring them to a wire rack to cool completely. This step helps them set and makes them easier to remove from the sheets without falling apart.

Tips for Success:
- Butter Temperature: Make sure the butter is at room temperature before mixing. Cold butter doesn’t cream well with the sugars and can result in a denser texture.
- Don’t Overmix the Dough: Overmixing the dough after adding the flour can result in tough treats. Mix just until everything is combined.
- Customize Your Treats: You can easily customize these treats by adding your favorite ingredients. Try throwing in chopped nuts, dried fruits, or even a few marshmallows for a fun twist.
- Chill the Dough: If you want to prevent the dough from spreading too much during baking, chill it in the refrigerator for 30 minutes before baking. This will result in thicker, chewier treats.
- Storage Tips: Store the treats in an airtight container at room temperature for up to 1 week. You can also freeze the dough for later use—just scoop the dough onto a baking sheet, freeze for 1 hour, and then store the frozen dough balls in a plastic bag. When ready to bake, simply add a few extra minutes to the baking time.
FAQ (Frequently Asked Questions):
Q: Can I use milk chocolate chips instead of semi-sweet?
A: Yes, absolutely! If you prefer a sweeter treat, milk chocolate chips will work beautifully. However, keep in mind that the overall sweetness of the treat will be higher.
Q: How do I make my treats more chewy?
A: To achieve a chewier texture, bake the treats for slightly less time, and make sure the dough isn’t overmixed. Chilling the dough before baking can also help.
Q: Can I freeze the dough?
A: Yes! You can freeze the dough for up to 3 months. Simply scoop the dough into individual portions, freeze on a baking sheet, and transfer the frozen dough balls into a freezer-safe bag. When ready to bake, you can bake them directly from the freezer; just add a couple of extra minutes to the baking time.
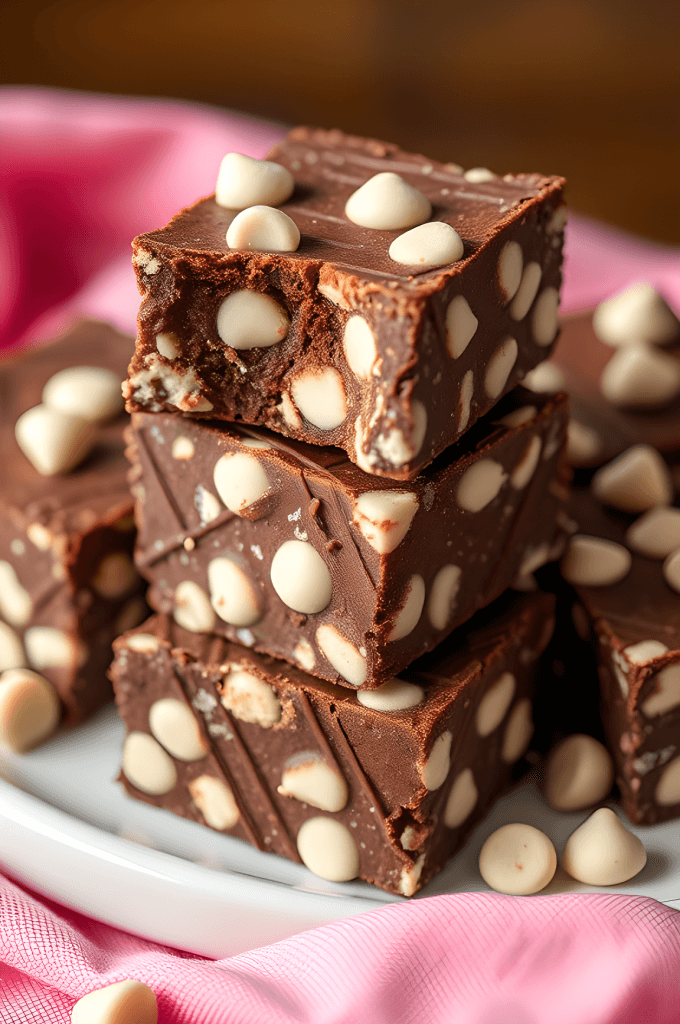
Conclusion
These Chocolate White Chip Treats are the perfect balance of creamy white chocolate and rich semi-sweet chocolate. Whether you’re baking them for a special occasion, a holiday gathering, or just to enjoy on a cozy afternoon, they’ll quickly become a favorite in your baking repertoire. The beauty of this recipe lies in its simplicity and versatility, allowing you to make it your own with different variations.
Every bite of these treats will remind you of the comfort of home baking, and the joy that comes from sharing something delicious with friends and family. Happy baking, and may your kitchen always be filled with the sweet aroma of freshly baked Chocolate White Chip Treats!