Introduction: The Magic of Easter Bunny Cupcakes
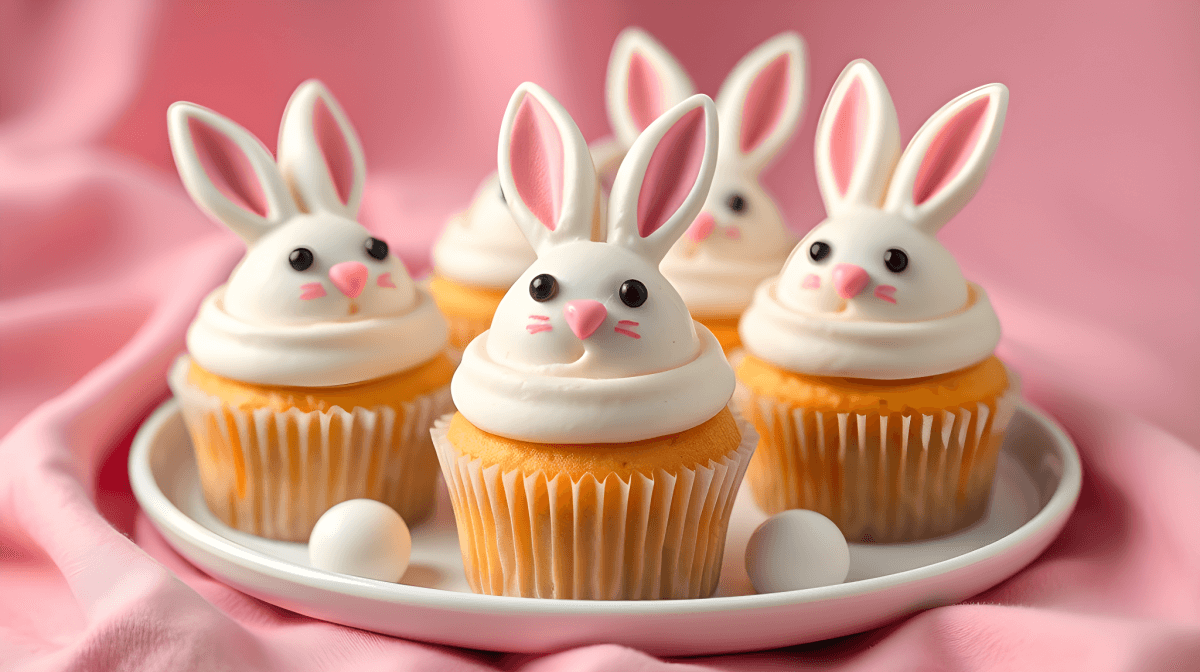
Easter is a time for family, fun, and, of course, delicious treats! And what could be better than adorable Easter Bunny Cupcakes to brighten up your holiday table? These cupcakes are more than just a sweet treat; they’re a statement piece that will instantly elevate your Easter celebration. With fluffy, moist cupcakes topped with pastel frosting, cute bunny ears, and little edible noses, these cupcakes are sure to make a lasting impression on your friends and family.
I’ve always loved baking during the spring season, especially for Easter. It’s a time when the world begins to bloom, and the colors of the flowers and the bright sun inspire all things colorful and cheerful. My love for baking runs deep, rooted in memories of my grandmother’s kitchen where we’d spend hours creating delicious desserts. Easter was always extra special, filled with laughter, family gatherings, and of course, cupcakes.
These Easter Bunny Cupcakes are easy to make, fun to decorate, and best of all, they’ll have everyone at your table saying “Awww!” in unison. Whether you’re hosting an Easter brunch, a spring picnic, or just looking for a festive treat to enjoy with your loved ones, these cupcakes are sure to be the highlight of your celebration.
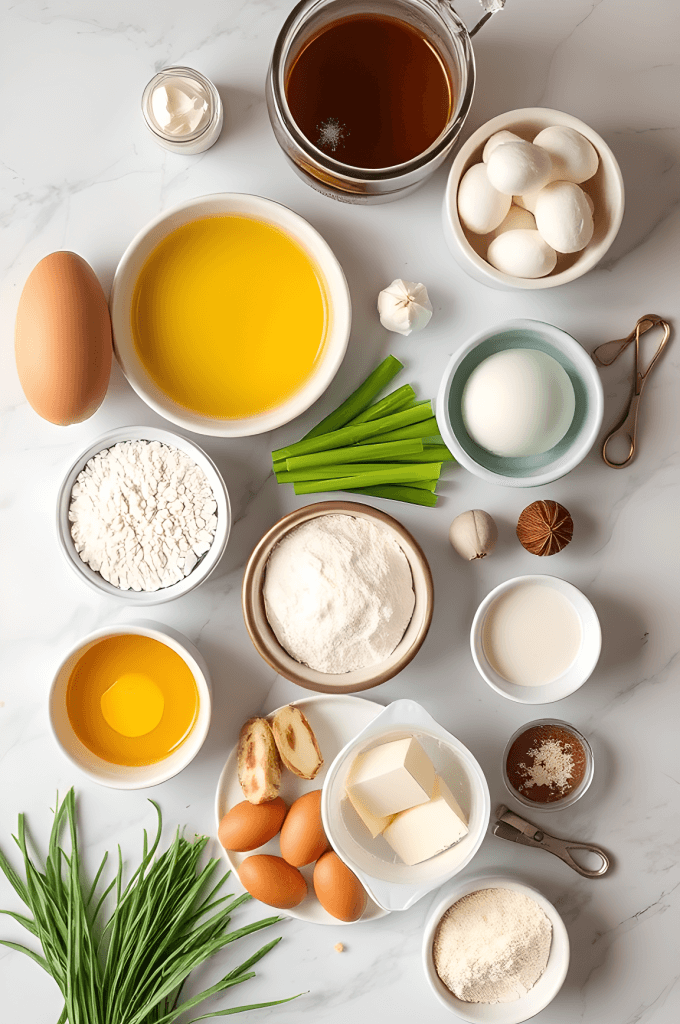
Ingredients
For the Cupcakes:
- 1 ½ cups all-purpose flour
- 1 ½ teaspoons baking powder
- ½ teaspoon salt
- 1/2 cup unsalted butter, softened
- 1 cup granulated sugar
- 2 large eggs
- 1 teaspoon vanilla extract
- ½ cup whole milk
- ¼ cup sour cream (for extra moistness, optional)
For the Frosting:
- 1 cup unsalted butter, softened
- 4 cups powdered sugar
- 2 teaspoons vanilla extract
- 2-4 tablespoons heavy cream (or milk)
- Pastel food coloring (optional)
For the Bunny Ears and Decoration:
- 12 large marshmallows (for bunny ears)
- Pink food coloring (for the inside of the ears)
- Mini chocolate chips (for the eyes)
- Pink sprinkles (for the noses)
- Shredded coconut (for the bunny fur, optional)
- A piping bag with a star tip (for the frosting)
Instructions
Step 1: Prepare the Cupcakes
Preheat your oven to 350°F (175°C) and line a muffin tin with 12 cupcake liners.
In a medium bowl, whisk together the flour, baking powder, and salt. Set aside.
In a large mixing bowl, cream the butter and sugar together using a hand mixer or stand mixer until light and fluffy (about 3-4 minutes). Add the eggs, one at a time, and beat well after each addition. Stir in the vanilla extract.
Alternate adding the dry ingredients and the milk to the wet ingredients. Start with a third of the dry ingredients, mix, then add half of the milk, and continue alternating until everything is combined. Be careful not to overmix the batter, as this can result in dense cupcakes.
If you’re using sour cream, fold it in at this point to ensure the cupcakes will be extra moist.
Step 2: Bake the Cupcakes
Spoon the batter evenly into the cupcake liners, filling each about two-thirds full. This will help ensure they rise perfectly. Bake for 18-20 minutes, or until a toothpick inserted into the center comes out clean. Allow the cupcakes to cool in the tin for 5 minutes before transferring them to a wire rack to cool completely.
Step 3: Make the Bunny Ears
While the cupcakes are cooling, let’s get started on the adorable bunny ears. Take the marshmallows and cut them in half diagonally to create the shape of bunny ears. Then, using pink food coloring, dab a small amount of color on the cut side of each marshmallow half to create the inner part of the bunny ears. Allow the marshmallows to dry for a few minutes.
Step 4: Prepare the Frosting
In a large bowl, beat the butter until smooth. Gradually add the powdered sugar, 1 cup at a time, while mixing on low speed. Once all the sugar is incorporated, add the vanilla extract and heavy cream. Beat on medium speed for 2-3 minutes until the frosting is light and fluffy.
If you’re aiming for pastel colors, divide the frosting into separate bowls and add a few drops of food coloring to each. For Easter Bunny Cupcakes, I recommend soft pastel shades like light pink, lavender, mint green, or even pale yellow.
Step 5: Frost the Cupcakes
Once the cupcakes have cooled completely, it’s time to frost them. Use a piping bag fitted with a star tip to pipe the frosting onto each cupcake, creating a nice, fluffy swirl of frosting.
You can make the frosting look even more fun by using a variety of pastel colors and piping them in sections, blending them together slightly for a marbled effect.
Step 6: Add the Bunny Ears and Decorate
Gently press a marshmallow bunny ear into the top of each cupcake. Make sure they’re standing upright and securely in the frosting.
To complete the bunny look, add a mini chocolate chip for each eye, and sprinkle some pink sprinkles in the center of the frosting to create the bunny’s nose. For the bunny fur, you can optionally roll the sides of the frosting in shredded coconut, giving it a fluffy, fuzzy texture.
Step 7: Serve and Enjoy!
Once all your cupcakes are decorated, they’re ready to be enjoyed. Serve them on a festive platter or individual plates. These Easter Bunny Cupcakes are sure to bring joy to both kids and adults alike, making your Easter celebration that much sweeter.

Tips for Perfect Easter Bunny Cupcakes
- Cupcake Texture: Be sure not to overmix the cupcake batter to keep them light and fluffy. Mixing until just combined will help achieve a perfect texture.
- Frosting Consistency: If your frosting is too thick, add a little more heavy cream or milk to get the right consistency for piping. If it’s too thin, add more powdered sugar to thicken it.
- Bunny Ear Alternatives: If you don’t have marshmallows or want a different texture, you can use white fondant or cookies to create the bunny ears. Simply shape and color them the same way.
- DIY Bunny Ears: For a more creative approach, you can make bunny ears out of graham crackers and pink frosting to shape the inner part of the ears, giving them a homemade touch.
- Storage: These cupcakes can be stored in an airtight container at room temperature for up to 2-3 days. If you want to keep them longer, you can freeze them (without the decoration) for up to 3 months.
- Allergy-Friendly Option: For those with dietary restrictions, feel free to substitute dairy-free butter and milk in the cupcake and frosting recipes, and use gluten-free flour if needed.

Why Easter Bunny Cupcakes Are the Perfect Spring Dessert
Easter Bunny Cupcakes are the perfect way to celebrate the arrival of spring. Their vibrant colors, cute bunny designs, and light, fluffy texture make them a showstopper dessert for your Easter table. Not only do they look amazing, but they taste just as delicious as they look. The fluffy cupcakes paired with the creamy, pastel-colored frosting create a sweet and satisfying bite that everyone will love.
Whether you’re having an intimate Easter brunch or hosting a big family gathering, these cupcakes will be the star of your dessert spread. They are also a great activity to do with kids – allowing them to help decorate their own bunny cupcakes adds a personal touch to the celebration.